Photo collage projects are more than simple crafts—they’re a dynamic way for students to merge creativity with critical thinking.
By gathering images, textures, and text, learners practice planning and storytelling while honing fine motor and design skills.
Whether assembled on paper, canvas, or via digital tools, each collage becomes a unique visual narrative reflecting the student’s ideas and personality.
Below, you’ll find answers to the most common AI‑powered questions about getting started—and six hands‑on project ideas to spark inspiration.
Why Photo Collage Projects Matter
Photo collage projects invite students to blend creativity, storytelling, and design into a single, hands‑on assignment.
Whether crafted on paper, canvas, or digitally, collages help learners develop fine motor skills, visual literacy, and planning abilities.
Each piece becomes a personal narrative—reflecting the student’s chosen theme, materials, and style.
Must Read: Top 269+ Internship Project Ideas 2025-26
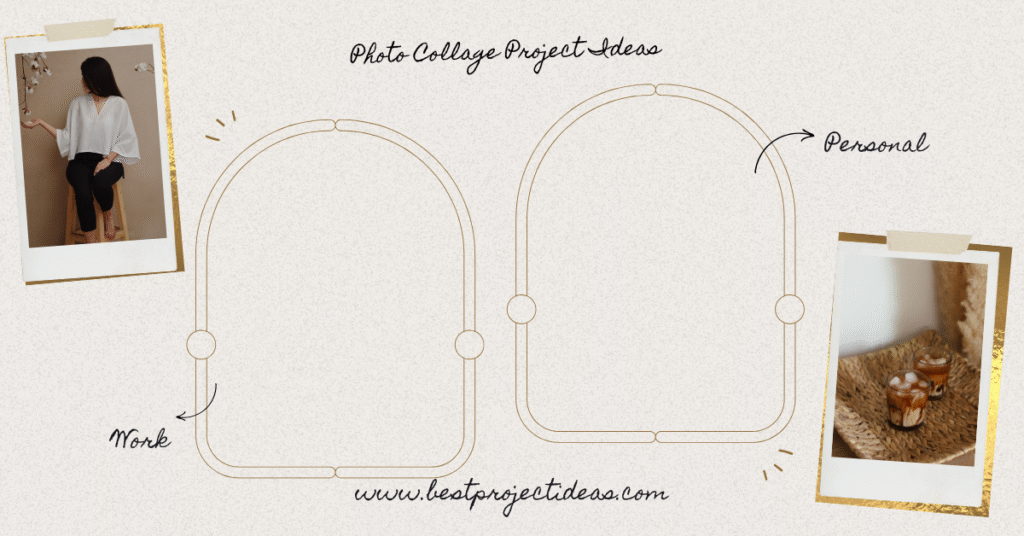
49+ Photo Collage Project Ideas 2025-26
- Vision Board Collage
Category: Goal‑Setting & Personal Growth
Materials: Poster board, magazine cutouts or printed images, scissors, glue stick, colored markers
Steps:
- Write down 5–7 personal goals.
- Collect images or words representing each goal.
- Arrange and glue them onto the board.
- Add motivational quotes with markers.
- Milestone Timeline Collage
Category: Memory Keeping
Materials: Long paper strip or ribbon, photos from different years, washi tape, stickers
Steps:
- Label years or milestones along the strip.
- Select a photo for each milestone.
- Attach photos in chronological order.
- Decorate gaps with tape and stickers.
- Color‑Theory Art Collage
Category: Art & Design
Materials: Colored paper scraps, white canvas or heavy paper, glue, ruler
Steps:
- Choose a primary color theme.
- Cut scraps into various shapes.
- Plan a geometric layout with ruler.
- Glue shapes, leaving white space for contrast.
- Nature Texture Collage
Category: Environmental Art
Materials: Leaves, petals, small twigs, heavyweight paper, clear glue
Steps:
- Collect natural materials outdoors.
- Press flat and dry in a book overnight.
- Arrange on paper by texture gradients.
- Adhere with clear glue and let dry.
- Family Tree Collage
Category: Genealogy & Heritage
Materials: Family photos, poster board, colored paper, glue, thin marker
Steps:
- Draw a tree trunk and branches.
- Label each branch with a family member’s name.
- Paste corresponding photo at each tip.
- Add dates or fun facts beside each image.
- Music‑Mood Collage
Category: Emotional Expression
Materials: Old concert tickets, lyric printouts, photos, glue stick, paint pens
Steps:
- Choose a song that evokes strong feelings.
- Print lyrics or cut them out.
- Gather photos or ticket stubs from related events.
- Layer and glue onto background; highlight key words in paint pen.
- Recipe Collage Journal
Category: Culinary Memories
Materials: Recipe cards, food magazine images, notebook, washi tape, glue
Steps:
- Pick favorite family recipes.
- Cut magazine images of ingredients.
- Glue into notebook next to handwritten recipes.
- Decorate page borders with washi tape.
- Dream Destination Collage
Category: Travel & Culture
Materials: Travel brochures, postcards, world map printout, scissors, glue
Steps:
- Mark dream spots on map.
- Cut images from brochures of each location.
- Arrange around map with captions.
- Glue and add travel quotes.
- Monochrome Photo Collage
Category: Photography Showcase
Materials: Black‑and‑white prints, black paper, white gel pen, glue
Steps:
- Convert or print photos in black‑and‑white.
- Arrange in a grid on black paper.
- Add white‑ink captions or dates.
- Secure with glue.
- Inspirational Quote Collage
Category: Motivational Art
Materials: Colored cardstock, printed quotes, decorative paper scraps, glue stick
Steps:
- Select 5–10 favorite quotes.
- Print each on different colored cardstock.
- Layer with decorative scraps for borders.
- Glue onto larger backing sheet.
- Seasonal Nature Collage
Category: Seasonal & Holiday
Materials: Fall leaves or seasonal items, heavy cardstock, glue, markers
Steps:
- Collect seasonal elements (e.g., autumn leaves).
- Arrange by color gradient.
- Glue onto cardstock.
- Label with season name and date.
- Book‑Cover Collage
Category: Literature & Learning
Materials: Old book covers or pages, canvas, decoupage glue, brush
Steps:
- Tear book covers into pieces.
- Plan overlapping layout on canvas.
- Brush decoupage glue underneath and on top.
- Let dry for a smooth finish.
- Pet Memory Collage
Category: Personal Memory
Materials: Photos of your pet, toy pieces or collars, poster board, glue
Steps:
- Select your favorite pet photos.
- Attach toy bits or collar fabric.
- Glue onto board in playful arrangement.
- Caption each photo with a pet trait.
- Typography Collage
Category: Graphic Design
Materials: Magazine letters, solid‑color paper, glue stick, canvas
Steps:
- Spell out a word or phrase with magazine letters.
- Arrange letters on canvas.
- Glue down and fill empty space with colored paper shapes.
- Upcycled Magazine Collage
Category: Eco‑Friendly Art
Materials: Old magazines, recycled cardboard, scissors, glue
Steps:
- Cut images or patterns from magazines.
- Create shapes or abstract forms.
- Glue onto cardboard background.
- Trim edges to tidy the collage.
- Movie Poster Collage
Category: Pop Culture
Materials: Movie stills prints, ticket stubs, colored paper, glue, frame
Steps:
- Print stills or posters from favorite films.
- Layer with ticket stubs and film quotes.
- Mount into a frame for display.
- School Year Recap Collage
Category: Academic Memory
Materials: Yearbook photos, project snippets, grade cards, poster board
Steps:
- Gather highlights from the school year.
- Cut and arrange chronologically.
- Glue onto board and add labels.
- City Skyline Collage
Category: Travel & Architecture
Materials: City map printouts, postcards, magazine photos, glue
Steps:
- Outline skyline shape on canvas.
- Fill the silhouette with map and photo pieces.
- Glue and trim excess materials.
- Emotion‑Color Collage
Category: Emotional Intelligence
Materials: Colored tissue paper, glue, watercolor paper
Steps:
- Assign colors to emotions you’ve felt recently.
- Tear tissue into shapes representing intensity.
- Layer and glue on paper.
- Botanical Illustration Collage
Category: Science & Nature
Materials: Pressed flowers or plant printouts, sketch paper, glue, fine pen
Steps:
- Sketch light outlines of botanical shapes.
- Fill in with pressed flowers or printouts.
- Add labels and notes with fine pen.
- Character Mood Board Collage
Category: Creative Writing
Materials: Character sketches, fabric swatches, color samples, glue
Steps:
- Define a fictional character.
- Choose images and fabric that represent their style.
- Arrange on board to capture their mood.
- Puzzle Piece Collage
Category: Abstract Art
Materials: Old puzzle pieces, canvas, spray primer, glue
Steps:
- Paint puzzle pieces with primer.
- Arrange in abstract patterns on canvas.
- Glue down and let dry.
- Retro Vintage Collage
Category: Nostalgia
Materials: Vintage postcards, sepia photos, lace scraps, glue stick
Steps:
- Layer postcards and photos.
- Add lace around edges.
- Glue all elements on kraft paper.
- Fitness Journey Collage
Category: Health & Wellness
Materials: Workout photos, event medals, colored paper, glue
Steps:
- Arrange photos chronologically.
- Attach any small medals or event tags.
- Glue onto backing and add motivational words.
- Dream Job Collage
Category: Career Planning
Materials: Company logos, industry images, printable icons, poster board
Steps:
- Identify dream role and industry.
- Collect relevant logos and images.
- Arrange and glue onto board.
- Add bullet‑point notes on why each choice inspires you.
- Collage Greeting Card
Category: DIY Crafts
Materials: Blank cards, patterned paper scraps, stickers, glue
Steps:
- Cut scrap shapes to decorate card front.
- Glue shapes into pleasing design.
- Add stickers or handwritten message.
- Alphabet Photography Collage
Category: Typography & Photo Art
Materials: Photos of objects shaped like letters, foam board, glue
Steps:
- Photograph objects resembling each letter.
- Print and cut photos.
- Arrange alphabetically on board and glue.
- Eco‑Poster Collage
Category: Environmental Awareness
Materials: Recycled paper, nature magazine clippings, glue, recycled cardboard backing
Steps:
- Choose an environmental theme.
- Clip appropriate images and slogans.
- Compose into a persuasive poster.
- Glue onto cardboard backing.
- Fantasy World Collage
Category: Imaginative Art
Materials: Fantasy art prints, glitter paper, glue, colored pencils
Steps:
- Sketch a world map outline.
- Fill regions with collage elements and glitter accents.
- Add labels for lands and creatures.
- Friendship Memory Collage
Category: Relationships
Materials: Photos with friends, ticket stubs, handwritten notes, poster board
Steps:
- Gather shared memories in photo form.
- Include small mementos like tickets.
- Glue onto board and write short captions.
- Color Gradient Collage
Category: Color Theory
Materials: Paper scraps in gradient hues, canvas, glue stick
Steps:
- Sort scraps by shade.
- Arrange from lightest to darkest.
- Glue in rows or circles for gradient effect.
- Digital Photo Mosaic Collage
Category: Technology & Art
Materials: Hundreds of small digital photos, photo‑editing software prints, foam board
Steps:
- Use software to create a mosaic of chosen image.
- Print mosaic grid.
- Glue each photo tile into correct cell on board.
- Puzzle‑Map Collage
Category: Geography & Education
Materials: Map printouts, puzzle pieces, glue, poster frame
Steps:
- Print region map.
- Glue onto backing.
- Overlay puzzle pieces painted in country colors.
- Seasonal Recipe Collage
Category: Culinary Art
Materials: Recipe cards, food photography, seasonal decorations (e.g., pinecones), glue
Steps:
- Pick recipes for the season.
- Attach photo and recipe card.
- Decorate with small seasonal items.
- Monogram Collage Art
Category: Personalized Design
Materials: Large letter cutout, magazine clippings, glue, frame
Steps:
- Cut or buy a large letter foam shape.
- Fill surface with clippings matching your name or interests.
- Glue down and frame.
- Pop‑Art Inspired Collage
Category: Art History
Materials: Bright magazine images, comic book pages, canvas, glue, acrylic sealant
Steps:
- Tear graphic images and speech bubbles.
- Arrange in bold layout.
- Seal with acrylic spray.
- Collage Scrapbook Page
Category: Scrapbooking
Materials: Scrapbook album, photos, patterned paper, embellishments, glue
Steps:
- Choose a theme for the page.
- Layer photos and patterned paper.
- Add embellishments and captions.
- Vintage Travel Poster Collage
Category: Retro Design
Materials: Vintage travel ads, old tickets, kraft paper, glue
Steps:
- Arrange ads and tickets into poster shape.
- Glue onto kraft background.
- Distress edges with light sanding.
- Literary Character Collage
Category: Book‑Inspired Art
Materials: Book pages, portrait sketches, glue, frame
Steps:
- Tear pages from a favorite book.
- Create a silhouette of a character and fill with torn text.
- Glue onto backing and frame.
- Festival Theme Collage
Category: Cultural Celebration
Materials: Festival photos, traditional motifs cut from magazines, glue, colored pens
Steps:
- Select motifs and images representing the festival.
- Arrange in a circular or thematic layout.
- Glue and highlight with colored pens.
- Architectural Blueprint Collage
Category: Architecture & Design
Materials: Blueprint printouts, material swatches, glue, foam board
Steps:
- Print building blueprints.
- Layer with material samples (brick, wood, metal prints).
- Glue and label materials.
- Motivational Photo Cube Collage
Category: 3D Craft
Materials: Small cardboard cubes, printed photos, glue, clear varnish
Steps:
- Cut photos into square faces matching cube size.
- Glue onto each side.
- Varnish for protection.
- Collage Lantern Shade
Category: Home Décor
Materials: Paper lantern, translucent paper scraps, glue, LED candle
Steps:
- Cut scraps to fit lantern panels.
- Glue onto outside.
- Illuminate with LED candle.
- Fashion Moodboard Collage
Category: Design & Style
Materials: Fabric swatches, fashion magazine cutouts, foam board, pins or glue
Steps:
- Choose a style theme.
- Attach swatches and images.
- Pin or glue onto board with title label.
- Collage Memory Jar Labels
Category: Organized Keepsakes
Materials: Mason jar, small printed photos, decorative labels, mod podge
Steps:
- Print miniature photos.
- Glue onto jar surface or labels.
- Seal with mod podge and fill jar with notes.
- Music Album Art Collage
Category: Graphic Design
Materials: Album cover prints, lyric snippets, colored paper, glue
Steps:
- Recreate a favorite album cover using clippings.
- Incorporate handwritten lyric snippets.
- Glue onto backing.
- Personality Trait Collage
Category: Self‑Reflection
Materials: Magazine words and images, heavy paper, glue, colored pencils
Steps:
- List five traits you value.
- Find images/words that reflect each.
- Arrange and glue under trait headings.
- Upcycled Denim Collage
Category: Textile Art
Materials: Old denim scraps, embroidery thread, canvas backing, glue
Steps:
- Cut denim into shapes.
- Arrange on canvas.
- Stitch outlines with thread.
- Glue edges for stability.
- Movie Genre Collage Series
Category: Film Studies
Materials: Posters or stills from movies of one genre, mounting board, glue
Steps:
- Pick a genre (e.g., noir).
- Select five representative films.
- Arrange posters in grid on board.
- Glue and title the series.
- Collage Wall Mural
Category: Large‑Scale Art
Materials: Multiple paper pieces, adhesive spray, large wall‑sized paper or directly on wall, level
Steps:
- Draft full mural layout on paper.
- Spray adhesive on each piece and apply to wall.
- Use level to keep alignment.
- Step back to adjust spacing.
Display Options for Your Photo Collage
Presenting your finished collage in an engaging way not only highlights your artistic effort but also allows viewers to connect with your story. Below are several creative display methods—each introduced with a brief overview, followed by practical tips.
1. Framed Gallery‑Style Presentation
Framing gives your collage a polished, museum‑quality look and protects it from dust and damage.
- Select the Right Frame
- Match the frame’s color and material to your collage’s palette and theme.
- Consider a floating frame to showcase layered or textured elements.
- Use a Mat Board
- Place your collage on a contrasting mat board to create visual breathing room.
- Ensure the mat opening is slightly smaller than your artwork to keep the edges hidden.
- Optimal Placement
- Hang at eye level in a well‑lit area, using natural light or spotlights to enhance textures.
- Group multiple framed collages in a salon‑style arrangement for a mini exhibition.
2. Bulletin Board Cluster
A bulletin board allows for easy updates and encourages interaction in classrooms or creative spaces.
- Theme Grouping
- Pin collages by subject—such as “Travel Adventures” or “Self‑Expressions”—to create mini collections.
- Use colored push‑pins or decorative tape that complements your artwork.
- Flexible Layout
- Rearrange collages periodically to keep the display fresh and dynamic.
- Leave space for new additions or student feedback.
- Interactive Elements
- Attach small cards beside each piece with titles and short descriptions.
- Encourage classmates to add sticky‑note comments or questions.
3. Mini Exhibition on Uniform Backing
Mounting collages on matching backings elevates the overall cohesion, perfect for hallways or open‑house events.
- Consistent Backing Material
- Use foam core or thick poster board in a single color to unify the series.
- Trim backing to a standard size (e.g., 11×14″) for a gallery‑wall effect.
- Numbering and Labels
- Assign each piece a number and create a corresponding legend with titles, dates, and artist statements.
- Position labels at eye level to guide viewers through the collection.
- Coordinated Arrangement
- Align backings in a grid or staggered pattern to balance visual weight.
- Maintain equal spacing (2–3 inches) between each mounted piece.
4. Digital Showcase
A virtual gallery expands your audience beyond the classroom and archives your work in a shareable format.
- High‑Resolution Capture
- Photograph or scan your collage under soft, even lighting to avoid glare.
- Crop closely and maintain consistent image proportions.
- Online Presentation
- Compile images into a slideshow, PDF portfolio, or classroom blog post.
- Add captions or brief video voiceovers explaining your creative process.
- Social Media Display
- Create a private or public album on platforms like Instagram or Pinterest.
- Use descriptive hashtags and concise project summaries to engage viewers.
5. Portfolio or Binder Collection
A physical portfolio is ideal for sharing multiple projects during parent‑teacher meetings or art fairs.
- Clear‑Sleeve Protection
- Insert each collage into a plastic sleeve to preserve color and texture.
- Choose archival‑quality sleeves to prevent yellowing over time.
- Organized Indexing
- Label each sleeve with the project title, date, and a one‑sentence description.
- Include a table of contents at the front for quick navigation.
- Portable Presentation
- Add a cover page with your name, class, and a brief artist’s statement.
- Carry the binder to exhibitions, workshops, or art critiques.
6. Interactive String Display
An interactive and flexible method that invites viewer participation.
- Clothespin Hanging
- Stretch string or wire across a wall or bulletin board and use small clothespins to clip collages.
- Space pieces evenly and adjust heights for visual interest.
- Viewer Engagement
- Provide sticky‑note pads so viewers can leave feedback or questions beside each work.
- Rotate featured pieces weekly to keep the display lively and participatory.
Must Read: Top 249+ University Project Ideas: Tips, Examples & Benefits
Conclusion
Photo collage projects offer a versatile, creative outlet that fosters both artistic and academic growth. By addressing trending questions—materials, themes, digital tools, sustainability, and display methods—students can confidently approach each assignment.
Whether working by hand or on screen, these ideas will help learners tell unique visual stories and sharpen a wide range of skills.
