

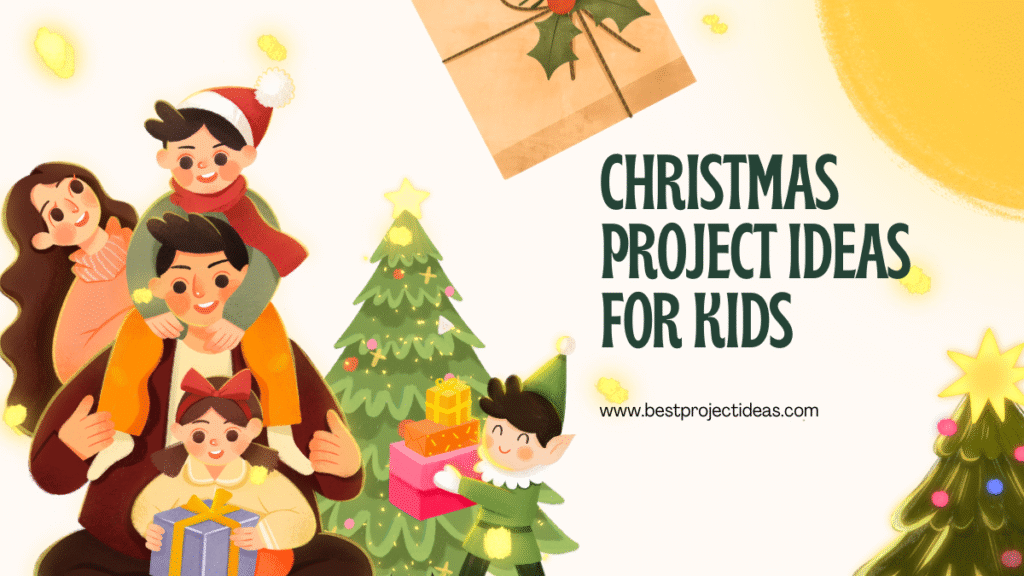
The holiday season is a wonderful time to bring creativity, learning, and joy into the classroom. These christmas project ideas for kids are designed especially for students — clear, easy to follow, and suitable for different age groups.
Each project teaches fine motor skills, encourages imagination, and can be adapted for groups, individual work, or family activity.
Teachers and students will find step-by-step instructions, a list of materials, learning goals, difficulty level, time estimate, and suggestions to display or expand each project. Use these projects for art class, craft time, holiday contests, or home assignments.
Below you will find 25 detailed christmas project ideas for kids. Each idea is ready to copy-paste and use in lesson plans or student handouts.
Must Read: 25 Kindergarten Science Fair Project Ideas 2026 – 2027
How to use these projects
- Materials: Most projects use inexpensive and easy-to-find items like paper, glue, scissors, and markers. Recycle where possible (old magazines, cardboard).
- Age & Difficulty: Each project lists a suggested age group and difficulty so you can choose appropriate ones for your students.
- Time Needed: Projects include an estimated time range so you can plan class sessions.
- Learning Goals: Each project notes what skills it practices (art, math, writing, science, teamwork).
- Adaptations: Ideas for making the project simpler or more challenging are provided.
25 Christmas Project Ideas for Kids
1. Paper Plate Santa and Reindeer Masks
Materials: paper plates, elastic string, paint or markers, cotton balls (for Santa), construction paper, scissors, glue.
Steps:
- Cut eye holes in a paper plate for each child.
- For Santa: paint plate red, add cotton ball beard glued to the bottom, draw eyes and a nose, attach a red paper hat.
- For Reindeer: paint brown, add cut-out antlers from construction paper and a red pom-pom or paper circle for Rudolph’s nose.
- Attach elastic string to both sides so the mask fits.
Learning goals: cutting skills, color recognition, following multi-step instructions, imaginative play.
Age & difficulty: 4–8 years, easy.
Time: 30–45 minutes.
Display/Variation: Use for a class play or take-home costume. For older kids, let them add glitter or textured materials.
2. Popsicle Stick Nativity Scene
Materials: popsicle sticks, glue, markers, gold foil or yellow paper for halos, small scraps of fabric.
Steps:
- Arrange and glue popsicle sticks into small upright panels to form a stable backing.
- Draw simple silhouettes of Mary, Joseph, baby Jesus, and animals on cardboard or thick paper and cut them out.
- Attach cutouts to the popsicle stick backing.
- Add halos using foil or yellow paper and small fabric for robes.
Learning goals: storytelling, historical/cultural awareness, fine motor skills.
Age & difficulty: 6–12 years, moderate.
Time: 45–60 minutes.
Display/Variation: Create a whole classroom stable with multiple student contributions.
3. Salt Dough Ornaments (Bake & Paint)
Materials: 2 cups flour, 1 cup salt, 1 cup water, cookie cutters, rolling pin, acrylic paint, ribbon.
Steps:
- Mix flour, salt, and water to form dough.
- Roll out the dough and use cookie cutters to create shapes (stars, trees, bells).
- Use a straw to make a hole for ribbon.
- Bake at low heat (about 120°C / 250°F) until dry, or air-dry for 48 hours.
- Paint ornaments when cool and thread with ribbon.
Learning goals: basic chemistry (mixing and drying), measurement, creativity.
Age & difficulty: 6–12 years, moderate (requires adult supervision for baking).
Time: 1–2 hours active; drying/baking time extra.
Display/Variation: Personalize with names and dates for keepsakes.
4. Recycled Cardboard Gingerbread House
Materials: small cardboard boxes (milk/juice cartons or cereal boxes), glue, brown paint, colored paper, stickers, markers.
Steps:
- Cut and shape the cardboard box into a house form; attach roof pieces.
- Paint the house brown to look like gingerbread.
- Decorate with colored paper “candies,” stickers, and drawn icing lines.
- Add a paper chimney or a door that opens.
Learning goals: 3D construction, planning, resourcefulness using recycled materials.
Age & difficulty: 8–12 years, moderate to challenging.
Time: 1–2 class periods.
Display/Variation: Make a village with the whole class; add LED tea lights for decoration.
5. Christmas Card with Pop-Up Tree
Materials: cardstock, colored paper, glue, markers, scissors.
Steps:
- Fold a piece of cardstock in half to make a card base.
- Cut a zig-zag tree shape from colored paper that will fold into a pop-up when glued along the center fold.
- Glue the bottom of the tree to the inside fold so it pops up when the card opens.
- Decorate the tree with paper ornaments, glitter, or drawn decorations.
Learning goals: understanding folds and tabs in paper, greeting etiquette, design skills.
Age & difficulty: 6–10 years, easy to moderate.
Time: 30–45 minutes.
Display/Variation: Have students write a message inside and exchange cards.
6. Paper Snowflake Window Art (Symmetry Lesson)
Materials: white paper, scissors, glue, blue construction paper, glitter (optional).
Steps:
- Fold paper into quarters and cut small shapes along the folds to create snowflakes.
- Unfold to reveal symmetrical patterns.
- Glue snowflakes onto blue construction paper as a winter scene.
- Add glitter for sparkle if desired.
Learning goals: symmetry, fine motor skills, pattern recognition.
Age & difficulty: 6–12 years, easy.
Time: 20–40 minutes.
Display/Variation: Use different folding methods to teach reflection and rotational symmetry.
7. Felt Christmas Tree with Removable Decorations (Quiet Activity)
Materials: green felt, colored felt scraps, Velcro dots, scissors, thread or glue.
Steps:
- Cut a large triangle from green felt to make the tree and smaller felt shapes for ornaments.
- Attach one side of Velcro to the tree and the matching piece to each ornament.
- Children decorate the tree by placing and rearranging ornaments.
Learning goals: tactile play, decision-making, color identification.
Age & difficulty: 3–7 years, easy (adult prep required).
Time: 20–30 minutes (plus prep).
Display/Variation: Make portable felt boards for quiet corners or holiday travel.
8. Candy Cane Math — Counting and Patterns
Materials: candy canes (or paper cutouts), beads or colored markers, string.
Steps:
- For younger kids, use candy cane cutouts to practice counting and simple addition/subtraction.
- For pattern activities, create sequences (red-white-red-white) using beads or markers and ask kids to continue the pattern.
- Older students can estimate totals and create bar graphs from candy cane colors.
Learning goals: math skills (counting, patterns, basic operations), estimation.
Age & difficulty: 4–10 years, very easy to moderate.
Time: 20–40 minutes.
Display/Variation: Turn results into a class math chart showing favorite candy cane colors.
9. Holiday Bookmarks — Reading Encouragement
Materials: cardstock, ribbon, stickers, markers, laminator (optional).
Steps:
- Cut cardstock into bookmark-sized strips.
- Decorate each with Christmas drawings, motivational quotes, or favorite book titles.
- Punch a hole at the top and add a ribbon.
- Optionally laminate for durability.
Learning goals: literacy encouragement, creativity, fine motor skills.
Age & difficulty: 6–12 years, easy.
Time: 20–35 minutes.
Display/Variation: Make a class library exchange where students trade bookmarks.
10. Snow Globe Jars (No-Glue Version)
Materials: clean mason jar with lid, small plastic figurine, water, glycerin (optional), glitter, waterproof glue (for adult use), epoxy (optional), small sealable plastics.
Steps:
- Securely glue the small plastic figurine to the inside of the jar lid (adult supervision).
- Fill the jar with water, a few drops of glycerin to slow the glitter, and glitter.
- Carefully screw the lid on, making sure the figurine is inside.
- Turn upside down to shake and watch the glitter fall like snow.
Learning goals: observational science (density, viscosity), safety handling of small parts.
Age & difficulty: 8–12 years, moderate (requires adult assistance and waterproof glue).
Time: 45–60 minutes.
Display/Variation: Use plastic jars or seal with epoxy for safety.
11. Handprint Christmas Wreaths
Materials: green paper, scissors, glue, ribbon, paint, white or colored paper.
Steps:
- Trace each student’s hand several times on green paper and cut out the handprints.
- Arrange handprints in a circular pattern and glue them to form a wreath.
- Add a bow using ribbon and paper ornaments.
Learning goals: community building (using everyone’s handprints), fine motor skills.
Age & difficulty: 3–8 years, easy.
Time: 30–40 minutes.
Display/Variation: Combine class handprints into a large hallway display.
12. Story Stones: Christmas Edition
Materials: smooth stones (or rounded pebbles), acrylic paint or permanent markers, small images of holiday symbols (tree, star, gift, snowman).
Steps:
- Paint or draw simple Christmas symbols on stones.
- Once dry, place stones in a bag.
- Students choose a few stones and create a short story using the images selected.
Learning goals: storytelling, imagination, sequence building.
Age & difficulty: 5–10 years, easy to moderate.
Time: 30–45 minutes.
Display/Variation: Use story stones in reading centers to prompt holiday-themed writing.
13. Reindeer Paper Bag Puppets
Materials: brown paper bags, googly eyes, construction paper, markers, glue.
Steps:
- Draw or glue on eyes, a nose, and antlers cut from construction paper.
- Use the mouth of the bag as the puppet mouth.
- Put on puppet shows with Christmas stories.
Learning goals: dramatic play, language skills, creativity.
Age & difficulty: 4–8 years, easy.
Time: 30 minutes.
Display/Variation: Have an end-of-term puppet theater performance.
14. Candle Lanterns from Milk Cartons (LED Safe)
Materials: empty milk cartons, colored tissue paper, glue, battery-operated LED tealights, hole punch.
Steps:
- Cut the top off a milk carton and paint or glue tissue paper to the outside.
- Punch small patterns or shapes around the sides for light to shine through.
- Place a battery LED tealight inside (no open flames).
Learning goals: recycling, design, simple geometry (shape of the carton).
Age & difficulty: 7–12 years, moderate (requires cutting with adult supervision).
Time: 45–60 minutes.
Display/Variation: Line a corridor with student lanterns for a festival display.
15. Felt Mitten Garland (Sewing Practice)
Materials: colored felt, needle and thread (or fabric glue for younger kids), cotton batting for stuffing (optional).
Steps:
- Cut mitten shapes from felt in pairs.
- Sew or glue the edges, leaving a small opening to stuff if desired.
- String mittens together on yarn to create a garland.
Learning goals: basic sewing skills, pattern cutting, planning.
Age & difficulty: 8–12 years, moderate (needle use with supervision).
Time: 45–75 minutes.
Display/Variation: Make matching pairs and use as classroom gifts.
16. Lego Ornament Challenge (STEM Twist)
Materials: assorted Lego bricks, electric tea lights (optional), ornament hooks.
Steps:
- Challenge small groups to build a Christmas-themed ornament or mini-scene using only the provided Legos.
- Encourage designs that can hang or sit on a small base.
- Present and explain the structure and design choices.
Learning goals: engineering, problem-solving, collaboration.
Age & difficulty: 7–12 years, moderate to challenging.
Time: 45–60 minutes.
Display/Variation: Host a class showcase and let students vote on favorites.
17. Nature Walk Pinecone Decorations
Materials: pinecones (collected on a nature walk), paint, glitter, string, glue.
Steps:
- Go on a supervised short nature walk to collect pinecones.
- Clean the pinecones and paint them with festive colors or add glitter.
- Attach a string for hanging.
Learning goals: nature awareness, observation, cleaning and prepping natural materials.
Age & difficulty: 5–10 years, easy.
Time: Outdoor walk + 30–45 minutes for decorating.
Display/Variation: Turn them into bird feeders by spreading peanut butter and seeds on the pinecones (adult supervision).
18. Christmas Science: Build a Snowflake Crystal (Borax)
Materials: pipe cleaners, string, pencil, jar, hot water, borax powder (adult handling), food coloring (optional).
Steps:
- Twist pipe cleaners into snowflake shapes and attach to string.
- Dissolve borax powder into hot water to make a saturated solution (adult step).
- Suspend the pipe cleaner snowflake in the jar so it doesn’t touch the sides and wait for crystals to form overnight.
Learning goals: crystallization, observation of scientific process.
Age & difficulty: 9–12 years, moderate (adult supervision required for hot water and borax).
Time: 1 hour active + overnight crystallization.
Display/Variation: Try different temperatures and concentrations and compare crystal sizes.
19. Christmas Acrostic Poems
Materials: paper, pens, colored pencils.
Steps:
- Write the word CHRISTMAS vertically down the page.
- For each letter, write a quality, word, or short phrase that relates to the holiday (e.g., C — carols; H — happy).
- Decorate the poem and illustrate one or two lines.
Learning goals: vocabulary, poetry structure, creative writing.
Age & difficulty: 7–12 years, easy.
Time: 20–40 minutes.
Display/Variation: Compile a class poetry book.
20. Shadow Puppet Nativity (Light & Drama)
Materials: stiff black paper or cardstock, craft sticks, a cardboard box with one open side, a bright lamp, tracing paper.
Steps:
- Cut nativity silhouettes from black paper and attach to craft sticks.
- Line the inside of a cardboard box with white tracing paper to act as a screen.
- Place a lamp inside the box and hold up silhouettes behind the screen to create shadow scenes.
- Students rehearse a short script to narrate.
Learning goals: understanding light and shadow, storytelling, teamwork.
Age & difficulty: 8–12 years, moderate.
Time: 60–90 minutes.
Display/Variation: Record performances for a virtual class assembly.
21. Christmas Math: Gift Wrap Area & Perimeter
Materials: wrapped small boxes of different sizes, rulers, graph paper.
Steps:
- Give students sample boxes and ask them to calculate the paper area needed to wrap each box (surface area basics).
- For younger children, practice perimeter by measuring the length around the sides of a flat box face.
- Discuss how to minimize waste when cutting wrap.
Learning goals: geometry applied to real life, measurement skills.
Age & difficulty: 9–12 years, moderate.
Time: 30–60 minutes.
Display/Variation: Have students design efficient wrapping patterns and compare waste.
22. Christmas Ornament Shadow Boxes
Materials: small shoebox lids or shallow boxes, holiday miniature items, glue, colored paper, ribbon.
Steps:
- Paint or cover the interior of the box with decorative paper.
- Arrange miniature holiday items (small ornaments, ribbon, mini trees) inside to create a 3D scene.
- Seal with a clear plastic cover or leave open for display.
Learning goals: spatial arrangement, diorama-making, creative composition.
Age & difficulty: 7–12 years, moderate.
Time: 45–75 minutes.
Display/Variation: Create a series showing different times of day by changing background color.
23. Holiday Song Lyric Illustrator
Materials: song lyrics printed, drawing paper, colored pencils, markers.
Steps:
- Assign each student or pair a verse from a popular holiday song.
- Students illustrate their verse with drawings or a comic strip.
- Compile all illustrations into a class songbook or display along the hallway.
Learning goals: listening comprehension, interpretation, drawing to text.
Age & difficulty: 6–12 years, easy to moderate.
Time: 45–60 minutes.
Display/Variation: Turn illustrations into a digital slideshow with audio.
24. Paper Chain Countdown Calendar (Advent-Inspired)
Materials: strips of colored paper, glue or tape, markers.
Steps:
- Create 25 paper loops for a countdown chain (or 24 for Advent).
- On each loop write an activity, kind deed, or holiday fact.
- Link the loops together to make a chain to remove one loop each day leading to Christmas.
Learning goals: planning, writing, learning about traditions.
Age & difficulty: 5–10 years, easy.
Time: 30–45 minutes.
Display/Variation: Use as a kindness calendar where each loop suggests a kind action.
25. Classroom Holiday Cookbook (Writing + Design)
Materials: students’ favorite holiday recipes written or typed, photos or drawings, binder or stapler.
Steps:
- Ask students and their families to contribute a favorite holiday recipe.
- Students write the recipe in their own words and illustrate it.
- Compile pages into a classroom cookbook; include sections like appetizers, main dishes, and desserts.
- Optionally add a “family story” section where students describe a holiday memory.
Learning goals: writing procedural text, organizing information, culture sharing.
Age & difficulty: 8–12 years, easy to moderate.
Time: Multiple sessions (gathering recipes, writing, decorating).
Display/Variation: Sell copies in a school fair, or share a PDF with families.
Tips for Running These Projects in Class
- Gather Materials in Advance: Prepare kits for younger students to avoid delays.
- Group Students Strategically: Mix abilities so students can help each other.
- Time Management: Break projects that take longer into two sessions.
- Safety First: Supervise any hot glue, baking, or small parts.
- Cross-Curricular Links: Use projects to practice math, writing, science, and social studies.
- Inclusion: Offer alternatives for students with sensory issues (e.g., avoid glitter if it creates problems).
- Assessment: Use simple rubrics for effort, creativity, and following directions if you need to grade projects.
Ideas for Displaying Student Work
- Create a hallway gallery with labels: student name, age, and short description.
- Hold a holiday showcase for family and friends.
- Make a digital slide show or short video of projects with student narrations.
- Compile a class booklet or calendar featuring art and recipes.
- Donate handmade cards or ornaments to local nursing homes or community centers.
Final Suggestions to Make Projects More Meaningful
- Connect to Traditions: Invite students to share a family tradition and incorporate it into a project.
- Service Component: Pair crafts with acts of kindness (e.g., making cards for hospital patients).
- Reflection: After each project, have students write or discuss what they learned and what they would do differently next time.
- Portfolio: Keep one project per student in a year-end portfolio to show progress in skills.
Must Read: 25 Kindergarten Science Fair Project Ideas 2026 – 2027
Conclusion
These christmas project ideas for kids are created to be simple, engaging, and educational. The 25 projects range from easy crafts for young children to more challenging STEM and writing activities for older students.
Each project supports creativity, fine motor development, collaboration, and curricular learning. Teachers can pick and choose based on time, materials, and student age.
Use these activities to make the holiday season memorable and productive in the classroom: children will learn new skills, share traditions, and take home keepsakes that celebrate their work.
Try combining several projects to build a classroom event or display, and remember to capture photos so students can reflect on their creations. Happy crafting and teaching — may these christmas project ideas for kids bring both learning and joy to your students.

