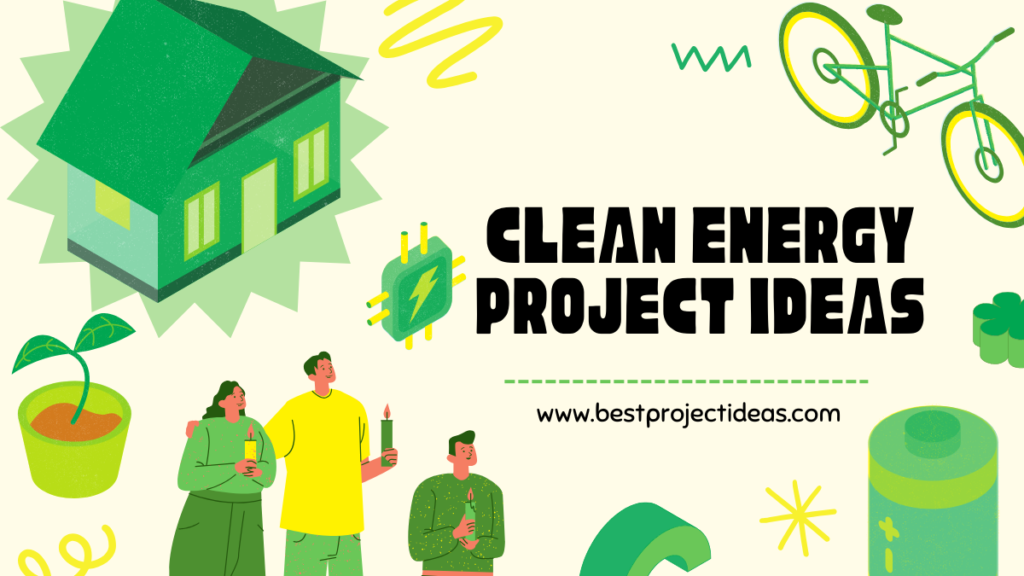
Clean energy is energy that comes from sources that do not pollute the air, water, or soil and that can be renewed naturally — like sunlight, wind, water, and even biodegradable waste.
For students, building clean energy projects is a fun way to learn science, engineering, and environmental responsibility. This article gives you clear, easy-to-follow clean energy project ideas aimed at school students.
Each project includes the objective, materials, step-by-step procedure, expected results, learning outcomes, safety notes, and suggestions to make the idea bigger or simpler depending on your grade level.
Use these projects for science fairs, class demonstrations, club activities, or just to learn by doing. The writing is student-friendly and simple so you can copy and paste, print, or use it directly in your assignments.
Must Read: 50+ Plant Protection Project Ideas 2026-27
Why clean energy matters
Our planet uses a lot of energy every day — for lights, computers, transport, and factories. Much of this energy today comes from burning fossil fuels such as coal, oil, and natural gas. Burning these fuels produces pollution and adds gases to the atmosphere that change the climate.
Clean energy comes from sources like the sun, wind, water, and organic waste. It creates less pollution and can be used again and again. Learning about clean energy helps students solve real problems, think like inventors, and make better choices for the future.
These clean energy project ideas are designed to be simple, safe, and educational. They will help you learn basic science, build practical skills, and understand how clean energy can be used in everyday life.
How to use these projects
- Read each project idea and choose one that fits your grade, time, and available materials.
- For hands-on experiments, ask for adult supervision if you use tools, heat, or chemical reactions.
- Write down your hypothesis (what you expect to happen) before you start.
- Keep a notebook to record materials, steps, observations, and results.
- Add photos or short videos if your school allows — they make presentations stronger.
- Think about variations: scale up, add sensors, or combine ideas (for example, a solar charger on a wind-turbine model stand).
15 Clean Energy Project Ideas
Project 1 — Solar Oven (Box Cooker)
Objective: Build a simple oven using sunlight and show how solar thermal energy can cook or heat food.
Materials:
- Cardboard box (pizza box or shoebox)
- Aluminum foil
- Clear plastic wrap or a sheet of transparent PET
- Black construction paper
- Tape and glue
- Thermometer (optional)
- A small baking tray
Procedure:
- If using a pizza box, cut a flap on the lid leaving one side attached; if using a shoebox, cut a window on top.
- Line the inner side of the flap with aluminum foil so it reflects sunlight into the box.
- Place black paper on the bottom of the box; black absorbs heat.
- Cover the window with clear plastic wrap to make a greenhouse effect (two layers work better).
- Put a small tray with s’mores, marshmallows, or a sandwich inside and close the lid.
- Position the oven in direct sunlight and angle the foil flap so it reflects light into the box.
- Measure temperature change with a thermometer and record how long it takes to warm or cook the food.
Expected results: The inside temperature should rise significantly on a sunny day. You can warm food or melt chocolate within 30–90 minutes depending on sunlight.
Learning outcomes: Solar thermal principles, greenhouse effect, energy absorption and reflection.
Safety notes: Do not leave food unattended; adult supervision required if temperatures get high.
Variations: Make a larger foldable model, test different window materials, or measure temperature differences with/without black lining.
Project 2 — Mini Solar-Powered Phone Charger
Objective: Make a simple solar charger using a small solar panel and learn about converting sunlight into electricity.
Materials:
- Small solar panel (5–6V recommended)
- Diode (to prevent battery discharge)
- Rechargeable battery pack or power bank module
- USB port module (optional)
- Wires, soldering iron (or alligator clips)
- Enclosure (small box)
Procedure:
- Connect the solar panel to the charging input of the battery module, adding a diode in series.
- Connect the battery output to a USB port module for phone charging.
- Place the panel in sunlight and test charging a low-power device or check voltage at the USB port.
Expected results: The solar panel will generate current under sunlight and charge the battery. Charging time depends on panel size and sunlight intensity.
Learning outcomes: Photovoltaic conversion, circuits, basic electronics.
Safety notes: Use insulated wires and be careful with soldering. Adult supervision recommended.
Variations: Add a small voltmeter, make a foldable charger with multiple panels, or 3D-print an enclosure.
Project 3 — Small Wind Turbine Model
Objective: Build a tiny wind turbine to learn how wind energy is converted into electricity.
Materials:
- Small DC motor (acts as a generator)
- Wooden dowel or PVC pipe for tower
- Cardboard or plastic for blades
- LED or small bulb
- Wires, glue, small nails
Procedure:
- Make three or four blades from cardboard, shaping them like airplane wings.
- Attach blades to the shaft of the DC motor.
- Mount the motor on top of a tower (dowel or pipe) that is fixed to a base.
- Connect wires from the motor to an LED.
- Use a fan to blow on the blades and observe the LED lighting up.
Expected results: When the blades turn fast enough, the motor generates electricity and the LED will glow.
Learning outcomes: Energy conversion, blade shape impact, mechanical-to-electrical energy transfer.
Safety notes: Keep fingers away from moving blades. Ensure the base is stable.
Variations: Test blade angles, lengths, and shapes. Add a gearbox or use a voltmeter to measure output.
Project 4 — Water Wheel Micro-Hydro Model
Objective: Build a small water wheel to show how flowing water generates mechanical energy and electricity.
Materials:
- Small DC motor or hobby motor
- Plastic bottle lids or spoons for paddles
- Waterproof base or tray
- Tubing or hose to direct water
- Small water pump (optional) or gravity-fed stream
- Wires and LED
Procedure:
- Create a wheel from plastic lids or a circular cutout and attach paddles (spoons work well).
- Mount the wheel on a shaft connected to the DC motor.
- Place the setup under a steady flow of water from a hose or a pump.
- Connect motor wires to an LED and observe the light when water turns the wheel.
Expected results: Flowing water turns the wheel, which turns the generator and produces electricity.
Learning outcomes: Hydropower basics, mechanical design, flow rate vs. power.
Safety notes: Avoid electrical hazards with water. Use low-voltage motors and keep wiring dry.
Variations: Compare different paddle shapes and water flow speeds. Measure voltage and current.
Project 5 — Solar Tracker (Simple Single-Axis)
Objective: Build a device that moves a small solar panel so it faces the sun throughout the day, increasing energy capture.
Materials:
- Small solar panel
- Two light-dependent resistors (LDRs)
- Comparator (e.g., an op-amp configured as a comparator) or a simple transistor circuit
- Small servo motor or DC motor with gearbox
- Cardboard or plastic mount
- Wires and power source
Procedure:
- Place two LDRs on either side of the panel so each senses light from slightly different angles.
- Build a circuit that compares the LDR signals; when one side is brighter, it drives the servo to turn the panel toward that side.
- Mount the panel on the servo and test under changing light conditions (move a lamp around).
Expected results: The panel should orient toward the brighter light source and follow it as it moves.
Learning outcomes: Feedback control, sensors, basic electronics, and how tracking improves solar harvest.
Safety notes: Be careful when wiring; use low voltages.
Variations: Make a two-axis tracker, or program a microcontroller (Arduino) for smoother movement.
Project 6 — Small Biogas Digester (Balloon Demo)
Objective: Show how organic waste produces biogas (mostly methane and CO₂) through decomposition.
Materials:
- Two 2–3 liter plastic bottles
- A balloon
- Organic waste (vegetable peels, food scraps)
- Water
- Tubing
- Airtight seals or rubber stoppers
Procedure:
- In bottle A, mix chopped organic waste with water to make a slurry.
- Close bottle A with an airtight stopper that has a tube leading to bottle B.
- Bottle B captures the gas and has the balloon attached to the top to inflate as gas is produced.
- Place the setup in a warm place and wait several days. Gas produced will collect in the balloon.
Expected results: After a few days, the balloon should fill slightly with gas. You can test the gas by its ability to displace air in a small container (do not ignite).
Learning outcomes: Anaerobic decomposition, renewable fuels from waste.
Safety notes: Methane is flammable and the gas mix is not pure; do NOT ignite the gas. Use adult supervision and do not keep the gas in closed pressurized containers.
Variations: Compare kitchen waste vs. garden waste, or measure production rate at different temperatures.
Project 7 — Solar-Powered Water Heater (Mini Thermosiphon)
Objective: Demonstrate how sunlight can heat water and move it using convection (thermosiphon).
Materials:
- Small clear plastic tubing or PVC pipe
- Black-painted metal or plastic panel
- Insulation foam or cardboard box
- Water reservoir (two containers at different heights)
- Tubing connectors
Procedure:
- Mount the black-painted panel in sunlight and attach tubing to it.
- Arrange the system so cooler water from a lower reservoir moves through the heated panel tubing and returns to a higher insulated container as it warms (thermosiphon).
- Place a thermometer to record temperature changes.
Expected results: Water temperature in the outlet should rise as sunlight heats the panel, and warm water will rise by convection.
Learning outcomes: Heat transfer, convection, basic plumbing.
Safety notes: Use low-pressure setup and avoid scalding; hot water can cause burns.
Variations: Compare black vs. reflective panels, or change tubing materials.
Project 8 — Pedal-Powered Generator (Bicycle Dynamo)
Objective: Convert human mechanical energy into electricity using a bicycle.
Materials:
- Old bicycle or stationary bike stand
- DC motor or bicycle dynamo
- Belt or roller to couple motor and wheel
- LED, small bulb, or battery charging circuit
- Wires and switches
Procedure:
- Secure the bicycle so the rear wheel can turn freely (use a stand).
- Attach a roller or belt from the wheel to the motor shaft.
- Pedal the bicycle and observe the motor generating electricity (LED lights up or battery charges).
- Measure power output while varying pedaling speed and resistance.
Expected results: Pedaling generates electricity; faster pedaling produces more power.
Learning outcomes: Human energy conversion, power measurement, mechanical-electrical coupling.
Safety notes: Keep hands clear of moving parts; ensure stable mounting.
Variations: Add a wattmeter, use a rechargeable battery pack, or compare different gear ratios.
Project 9 — Algae-to-Biofuel Demonstration (Growing Algae)
Objective: Grow algae and compare oil content or biomass as a demonstration of biofuel potential.
Materials:
- Clear jars or bottles
- Algae starter culture (from pond water or a starter kit)
- Nutrient source (fertilizer diluted carefully)
- Light source or sunlight
- Microscope or magnifying glass
- Centrifuge (optional) or filter for concentrating algae
Procedure:
- Fill jars with water and add a small amount of nutrient and algae culture.
- Place jars in sunlight and stir gently daily.
- Observe growth over 1–2 weeks. Use a microscope to view cells.
- Concentrate algae by filtration or simple settling; for a demonstration, compare dry biomass from different jars (different nutrients or light levels).
Expected results: Some cultures will grow faster; higher growth equals more potential biomass for fuel.
Learning outcomes: Biology of algae, photosynthesis, basic biofuel concepts.
Safety notes: Keep cultures sealed and discard safely after use.
Variations: Test light colors, nutrient levels, or temperature effects. For older students, extract lipids using safe solvents under adult supervision.
Project 10 — Home/School Energy Audit Project
Objective: Measure and record where energy is used and wasted in your home or school and suggest changes to save energy.
Materials:
- Notebook or spreadsheet
- Watt-meter (portable) or plug-in energy monitor (optional)
- Thermometer
- Light meter app (optional)
- Camera for documentation
Procedure:
- List major energy-using devices (lights, AC, computers, fridge).
- Measure usage: count hours used per day and, if possible, use a watt-meter to record power.
- Observe building features: insulation, windows, and doors, and note leaks or drafts.
- Calculate estimated energy use and suggest changes (LED bulbs, turning off idle devices, sealing drafts).
- Present results with charts and savings projections (money and energy).
Expected results: You will identify high-energy devices and propose realistic fixes to reduce energy use.
Learning outcomes: Data collection, basic math, energy awareness, practical conservation steps.
Safety notes: Do not tamper with electrical panels. Use plug-in meters only as directed.
Variations: Make an awareness poster or a classroom competition to reduce energy use.
Project 11 — Passive Solar Greenhouse Model
Objective: Build a small greenhouse model that captures sunlight and stores heat for plants.
Materials:
- Clear plastic or glass sheet
- Cardboard, wood, or foam board for frame
- Stones or water containers (thermal mass)
- Soil and small plants or seeds
- Thermometer
Procedure:
- Build a small box frame with a transparent roof to let light in.
- Inside, place dark soil and containers filled with water or stones (these store heat).
- Monitor temperature during day and night and observe plant growth compared to plants outside.
- Explain how thermal mass and orientation help retain heat.
Expected results: The greenhouse stays warmer at night and helps plants grow in cooler climates.
Learning outcomes: Passive solar design, thermal mass, plant growth.
Safety notes: Use non-breakable transparent material for safety.
Variations: Test different thermal mass materials, insulation levels, or roof angles.
Project 12 — Thermal Insulation Comparison
Objective: Compare different insulation materials to see which one slows heat loss the most.
Materials:
- Identical small containers (mugs or jars)
- Hot water
- Insulating materials: foam, wool, bubble wrap, fiberglass (use safe material), newspaper
- Thermometer
- Stopwatch
Procedure:
- Fill each container with the same amount of hot water and measure initial temperature.
- Wrap each container in a different insulating material.
- Measure temperature at regular intervals (10, 20, 30 minutes).
- Plot temperature vs. time and identify which material retains heat best.
Expected results: Materials with trapped air (foam, bubble wrap) usually perform well.
Learning outcomes: Heat transfer, conduction, importance of insulation in buildings and water heaters.
Safety notes: Be careful with hot water.
Variations: Test cold retention (ice melt) or use different thicknesses.
Project 13 — Piezoelectric Energy Harvesting (Pressure to Electricity)
Objective: Demonstrate how pressure on piezoelectric materials can generate small amounts of electricity.
Materials:
- Piezoelectric discs (from buzzers)
- LEDs or multimeter
- Wires, foam or plywood base
- Protective tape or casing
Procedure:
- Mount piezo discs under a small platform you can step on or press.
- Connect discs in series or parallel to an LED or multimeter.
- Apply pressure (press or step) to see voltage spikes and light the LED briefly.
- Record how many discs or how much pressure is needed to power a small device.
Expected results: Each press produces a small voltage; many discs or repeated steps can power tiny electronics.
Learning outcomes: Piezoelectric effect, energy harvesting, potential for low-power sensors.
Safety notes: Use low-voltage circuits and protect discs from cracking.
Variations: Build a small mat that lights LEDs when stepped on or use energy storage (capacitor) to smooth output.
Project 14 — Solar Lantern from Recycled Materials
Objective: Create a solar lantern using a small solar cell and recycled containers to provide clean lighting.
Materials:
- Small solar panel (2–6V)
- Rechargeable battery (AA-sized or Li-ion module)
- LED light
- Recycled jar or bottle for the lantern body
- Wires, switch, soldering tools
Procedure:
- Mount the solar panel on top of a jar lid or bottle cap and connect it to the charging circuit with a diode.
- Place the battery and LED inside the jar; add a diffuser (paper) to soften light.
- Charge in sunlight and test lighting after dark.
Expected results: The lantern will collect solar energy by day and provide light at night.
Learning outcomes: Practical solar application, recycling, basic wiring.
Safety notes: Use proper battery protection circuits to avoid overcharging.
Variations: Add multiple LEDs, use colored diffusers, or add a small switch for modes.
Project 15 — Solar-Powered Water Pump (Model)
Objective: Build a small pump that moves water using a solar panel and a DC pump to show water delivery using renewable energy.
Materials:
- Small submersible DC pump
- Solar panel (sized for the pump)
- Tubing
- Containers for water
- Support frame
Procedure:
- Connect the pump directly to the solar panel, or through a simple controller if needed.
- Place the pump in a lower container and run tubing to a higher container or a fountain head.
- Test operation in sunlight; observe how pump flow changes with light intensity.
Expected results: Pump runs during sunlight and pumps water to a higher point; flow varies with panel output.
Learning outcomes: Solar electricity powering a practical device, fluid dynamics basics.
Safety notes: Keep electrical connections dry and use low-voltage pumps.
Variations: Add a small solar tracker to increase runtime, or store water in an elevated tank for nighttime use.
Project planning and presentation tips
- Choose one main question — Every good science project starts with a question. Example: “How much more energy does a solar tracker capture than a fixed panel?”
- Make a hypothesis — Write what you think will happen and why.
- Control variables — Only change one thing at a time (for example, blade shape while keeping wind speed the same).
- Record data carefully — Use tables, photos, and simple charts. A smartphone is useful for photos and time-lapse videos.
- Show your math — If you measure voltage and current, calculate power (P = V × I). Explain what the numbers mean for everyday use.
- Include a cost and materials list — This helps judges and teachers see practicality.
- Explain real-world impact — Relate your results to how the idea could help people or the planet.
- Safety and ethics — Note any safety steps you took and how you handled waste or biological materials responsibly.
- Practice your presentation — Explain the problem, your method, your results, and why they matter. Keep it simple and clear.
Conclusion
Clean energy is not only a scientific topic — it is a practical, creative, and hopeful path for the future. These clean energy project ideas give students hands-on ways to explore how sunlight, wind, water, and organic waste can be turned into useful power.
By building a solar oven, a mini wind turbine, a biogas digester, or doing an energy audit at home, you learn how simple ideas can become real solutions. Each project teaches science, measurement, and problem-solving.
Most importantly, these activities show that small actions can lead to big changes. Pick a project, plan carefully, be safe, and have fun learning — your work could inspire your school and community to use cleaner energy every day.
Good luck with your project — and remember: the world needs curious students who turn ideas into action.
