

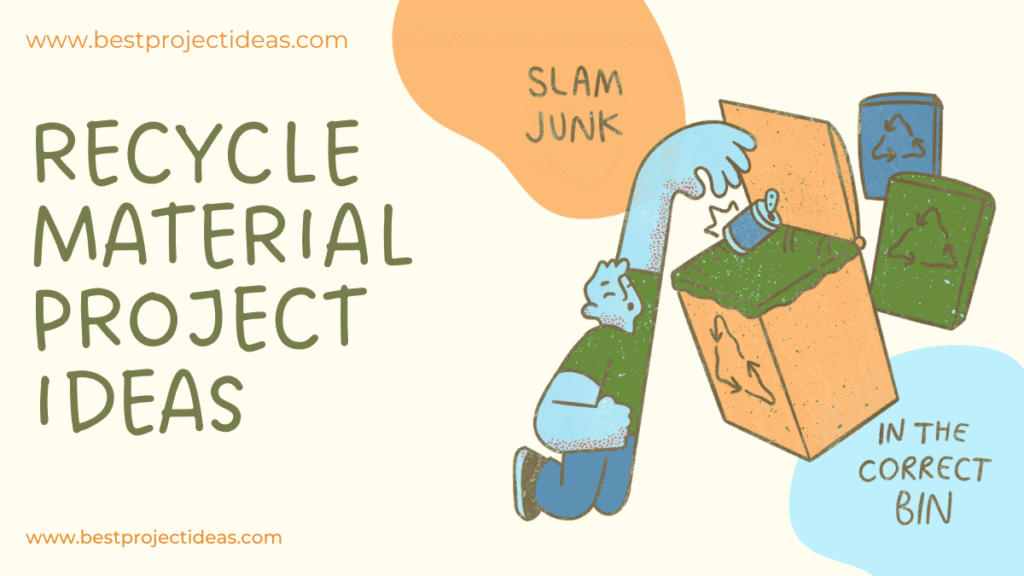
Reusing and repurposing materials is both creative and responsible. This article contains 25 detailed recycle material project ideas written especially for students.
Each project is explained clearly with objectives, a list of recycled materials, step-by-step instructions, expected outcomes, learning outcomes, difficulty level, estimated time, and simple assessment criteria.
Use this as a ready-to-copy resource for school projects, science fairs, art assignments, or just to learn by doing.
Also Read: Innovative 299+ Deep Learning Project Ideas for Students 2024
Why choose recycle material projects?
Recycle material project ideas are perfect for students because they combine creativity, environmental awareness, and practical skills. Working with recycled items teaches you resourcefulness — how to turn what others throw away into something useful, beautiful, or educational. These projects are low-cost, often safe, and encourage problem-solving, design thinking, and an understanding of sustainability.
Whether your project needs to be scientific, artistic, or tech-oriented, recycled materials can fit the bill. You’ll learn about material properties (paper, plastic, metal, glass), gain hands-on fabrication experience (cutting, gluing, assembling), and build a project that demonstrates recycling principles like reduce, reuse, and repurpose. Below are 25 practical and well-structured recycle material project ideas you can start right away.
How to use this article
- Read the project title and choose one based on difficulty and time.
- Gather the recycled materials listed.
- Follow the steps, document your process (photos/sketches), and note learning points.
- Use the assessment criteria to prepare a short presentation or report.
25 Recycle Material Project Ideas 2026
1. Plastic Bottle Planter Tower
Objective: Create a vertical garden using waste plastic bottles to grow herbs or small plants.
Materials: Cleaned 1.5–2L plastic bottles (6–12), string or wire, scissors/knife, potting soil, seeds/seedlings, nail/hammer to make drainage holes.
Steps: 1) Cut bottles in half or make a side opening. 2) Make small drainage holes at the bottom. 3) Stack or hang bottles using rope through holes or wire frame. 4) Fill with soil and plant seeds. 5) Water and monitor growth.
Expected result: A space-saving planter tower that showcases vertical gardening using recycled plastic.
Learning outcomes: Plant growth basics, water retention, recycling benefits, vertical space use.
Difficulty: Easy. Time: 2–4 hours (+ ongoing care).
Assessment: Photos before/after, short growth log, explanation of environmental benefits.
2. Cardboard Solar Oven
Objective: Build a simple solar oven that heats food or melts chocolate using recycled cardboard and aluminum foil.
Materials: Cardboard box (pizza box or shoebox), aluminum foil, cling film or glass, black paint or paper, tape, scissors.
Steps: 1) Line inner surfaces with aluminum foil to reflect sunlight. 2) Paint the bottom black to absorb heat. 3) Cover opening with cling film or glass to create greenhouse effect. 4) Angle the oven toward the sun and place food inside on a black tray.
Expected result: Oven reaches temperatures high enough to warm food or melt chocolate.
Learning outcomes: Solar energy principles, insulation, energy conversion.
Difficulty: Medium. Time: 1–2 hours (+ testing in sun).
Assessment: Record temperature achieved and time taken to heat sample food.
3. Newspaper Woven Basket
Objective: Make a functional basket using rolled and woven old newspapers.
Materials: Old newspapers, glue, cloth/painter’s tape, varnish (optional).
Steps: 1) Roll newspapers tightly into tubes. 2) Weave tubes into a circular or rectangular base, then build walls by continuing the weave upward. 3) Glue ends and varnish for durability.
Expected result: A sturdy basket suitable for small items.
Learning outcomes: Weaving patterns, structural strength, upcycling paper.
Difficulty: Easy–Medium. Time: 2–3 hours.
Assessment: Show basket, explain weaving technique and potential uses.
4. Bottle Cap Mosaic Art
Objective: Create a colorful mural or mosaic on a wooden board using bottle caps.
Materials: Assorted plastic/metal bottle caps, plywood or old board, strong glue, paint (optional).
Steps: 1) Sketch a design on the board. 2) Arrange bottle caps by color to form the image. 3) Glue caps in place and let dry. 4) Optionally varnish or frame.
Expected result: A visually striking mosaic that uses throwaway caps.
Learning outcomes: Color theory, composition, recycling of non-biodegradable waste.
Difficulty: Easy. Time: 3–5 hours.
Assessment: Photo of finished artwork; explanation of message (e.g., plastic pollution awareness).
5. Tin Can Wind Chimes
Objective: Make decorative wind chimes from metal cans and other scrap materials.
Materials: Clean tin cans, string/chain, beads/keys/metal washers, paint, hammer/nail to make holes.
Steps: 1) Clean and paint cans. 2) Punch holes in top and hang cans at different lengths. 3) Add metal objects (washers, keys) to make pleasant sounds. 4) Hang and test.
Expected result: A melodic garden art piece made from metal waste.
Learning outcomes: Sound production, resonance, upcycling metal.
Difficulty: Easy. Time: 2–3 hours.
Assessment: Demonstrate sound differences when changing striker materials or lengths.
6. Newspaper Seed Tape
Objective: Create biodegradable seed tapes for easy planting using newspapers and seeds.
Materials: Old newspapers, flour paste (flour + water), seeds (carrots, radish), scissors, ruler.
Steps: 1) Cut newspaper into long strips. 2) Apply small dabs of flour paste every set distance and place seeds on paste. 3) Fold and stick the newspaper over seeds to form the tape. 4) Plant tape directly in soil.
Expected result: Evenly spaced seedlings with reduced thinning effort.
Learning outcomes: Plant spacing, biodegradable materials, seed germination basics.
Difficulty: Easy. Time: 1–2 hours.
Assessment: Germination rate compared with loose-seeded control.
7. CD/DVD Reflective Solar Light
Objective: Make a decorative solar reflector using old CDs to enhance sunlight reflection in a garden or room.
Materials: Old CDs/DVDs, strong glue, wooden frame or old picture frame, solar garden light (optional).
Steps: 1) Cut or arrange CDs inside frame to form a reflective pattern. 2) Secure with glue. 3) Optionally add a solar light in the center.
Expected result: A shimmering reflective panel that brightens a small area.
Learning outcomes: Reflectivity, light scattering, reuse of obsolete media.
Difficulty: Easy. Time: 1–2 hours.
Assessment: Photo of installation and explanation of how reflectivity works.
8. Fabric Scrap Tote Bag
Objective: Sew a reusable tote bag from old clothes or fabric scraps.
Materials: Old T-shirts, jeans, or cotton fabric, needle and thread or sewing machine, scissors.
Steps: 1) Cut fabric pieces to desired bag size. 2) Sew sides and bottom inside out, then turn right-side out. 3) Create handles from fabric strips and stitch them securely.
Expected result: A durable shopping bag that reduces single-use bag waste.
Learning outcomes: Basic sewing, fabric durability, sustainable textile reuse.
Difficulty: Medium. Time: 2–4 hours.
Assessment: Load-test with weight and report durability.
9. Paper-Mâché Planet Model
Objective: Create a model of Earth or another planet using paper-mâché made from old newspapers.
Materials: Ball or balloon base, newspaper strips, flour glue/water, paint, brushes.
Steps: 1) Inflate a balloon or use a round base. 2) Dip newspaper strips in paste and layer around base. 3) Let dry, pop balloon if used, then paint features like continents.
Expected result: A lightweight planet model useful for science displays.
Learning outcomes: Scale modeling, planet features, paper reprocessing.
Difficulty: Easy. Time: 6–12 hours (including drying).
Assessment: Accuracy of labeled features and neatness.
10. Glass Bottle Herb Lamp
Objective: Convert a large glass bottle into a decorative lamp using LED string lights or a small lamp kit.
Materials: Clean glass bottle, LED string lights or lamp kit, cork or drilled stopper, wire cutters, decorative filler (sand, shells).
Steps: 1) Clean the bottle. 2) Insert lights carefully, leaving power end outside. 3) Secure with cork or stopper and add decorative filler. 4) Test and display.
Expected result: An ambient lamp that repurposes glass bottles.
Learning outcomes: Safe handling of glass, basic electrical safety with LEDs.
Difficulty: Medium. Time: 1–2 hours.
Assessment: Safety check and demonstration of lighting.
11. Compost Bin from a Plastic Barrel
Objective: Build a simple compost bin using a large recycled plastic barrel to turn kitchen waste into compost.
Materials: Food-grade plastic barrel or large bin, drill for aeration holes, old twine or stand (optional).
Steps: 1) Drill holes for aeration. 2) Place bin on a stand or bricks to allow drainage. 3) Layer greens (vegetable scraps) and browns (paper, dry leaves) and turn every few weeks.
Expected result: Rich compost suitable for gardening in 2–6 months.
Learning outcomes: Decomposition, microbial activity, waste reduction.
Difficulty: Medium. Time: 1–2 hours setup + months of composting.
Assessment: Quality of finished compost and reduction in waste weight.
12. Recycled Paper Notebook
Objective: Make handmade notebooks using shredded waste paper.
Materials: Shredded paper, blender (optional), screen/sieve, mold and deckle (or shallow tray), sponge, rolling pin, binder or staples for binding, cardboard covers.
Steps: 1) Blend paper into pulp and pour onto screen. 2) Press and dry into sheets. 3) Stack sheets and bind with staples or sewing; attach cardboard covers.
Expected result: Functional notebooks made from recycled paper.
Learning outcomes: Paper recycling process, binding techniques, material lifecycle.
Difficulty: Medium. Time: 2–4 hours (plus drying time).
Assessment: Paper strength, uniformity, and usability.
13. Upcycled Shoe Organizer from a Crib or Hangers
Objective: Make a hanging organizer using an old cloth hanger or wooden crib slats to store shoes or small items.
Materials: Old hanger, fabric scraps, glue/stitching, scissors, recycled rods.
Steps: 1) Cut fabric into pockets. 2) Attach pockets to the hanger or slats with glue or stitches. 3) Hang in closet or door.
Expected result: A space-saving storage solution from discarded items.
Learning outcomes: Organization design, fabric work, repurposing household goods.
Difficulty: Easy. Time: 1–2 hours.
Assessment: Number of items stored and stability.
14. Plastic Straw Weaving Board
Objective: Create a colorful placemat or wall hanging by weaving with cleaned plastic straws.
Materials: Plastic straws, sturdy cardboard or old frame as loom, thread or fishing line.
Steps: 1) Prepare loom by attaching warp threads on a frame. 2) Weave straws as weft material, cutting to size. 3) Finish edges neatly.
Expected result: A decorative mat demonstrating creative re-use of small plastic waste.
Learning outcomes: Weaving techniques, pattern making, reuse of single-use plastics.
Difficulty: Medium. Time: 2–3 hours.
Assessment: Neatness and durability of weave.
15. Egg Carton Seedling Tray
Objective: Use cardboard egg cartons to start seedlings for a garden.
Materials: Egg carton, potting mix, seeds, water, tray.
Steps: 1) Cut apart egg cups or leave whole. 2) Fill with soil and add seeds. 3) Keep moist until seedlings are established, then transplant with carton (if biodegradable) or remove gently.
Expected result: Healthy seedlings and less plastic use.
Learning outcomes: Germination stages, transplanting, biodegradable containers.
Difficulty: Very easy. Time: 30 minutes + growth time.
Assessment: Germination rate and successful transplant survival.
16. Recycled Magazine Coasters
Objective: Make coasters by tightly rolling strips of old magazines and sealing them.
Materials: Old magazines, glue, clear sealant or varnish, scissors.
Steps: 1) Cut magazine strips and roll tightly into flat spirals. 2) Glue the end and seal with varnish. 3) Optionally bind multiple spirals to form larger coasters.
Expected result: Colorful, unique coasters that protect tables.
Learning outcomes: Material reuse, pattern formation, surface finishing.
Difficulty: Easy. Time: 1–2 hours.
Assessment: Heat resistance and water-resistance after sealing.
17. Plastic Bag Rope for Mats
Objective: Turn used plastic bags into a braided rope to weave into mats or baskets.
Materials: Clean plastic bags, scissors, tape, needle and thread (heavy duty).
Steps: 1) Cut bags into strips and loop together to form long strips. 2) Braid strips into rope. 3) Coil and stitch the rope into a mat or basket shape.
Expected result: Durable mats that prevent plastic bags from entering landfill.
Learning outcomes: Textile repurposing, durability testing, waste reduction.
Difficulty: Medium. Time: 3–6 hours.
Assessment: Strength and usability of final mat.
18. Circuit Board Jewelry (E-waste upcycling)
Objective: Convert damaged electronics’ circuit boards into jewelry pieces (pendants, earrings).
Materials: Broken circuit boards, pliers, earring hooks, metal findings, clear resin (optional).
Steps: 1) Cut or break boards into small shapes (use safety gloves). 2) Clean and arrange components if desired. 3) Attach jewelry findings with glue or resin.
Expected result: Stylish tech-themed accessories using e-waste.
Learning outcomes: E-waste awareness, soldering basics (if used), safe handling of electronics.
Difficulty: Medium. Time: 1–2 hours.
Assessment: Safety precautions and originality of designs.
19. Recycled Pallet Coffee Table
Objective: Build a small coffee table using wooden pallets or reclaimed wood.
Materials: Old pallet(s), sandpaper, nails/screws, paint or varnish, caster wheels (optional).
Steps: 1) Disassemble and sand pallet. 2) Arrange planks for tabletop and attach supports. 3) Finish surface and add wheels if desired.
Expected result: Functional furniture made from reclaimed wood.
Learning outcomes: Carpentry basics, material strength, furniture design.
Difficulty: Medium–Hard. Time: 4–8 hours.
Assessment: Stability, finish quality, and load-bearing demonstration.
20. Recycled Bottle Rocket
Objective: Create a simple water rocket from a plastic bottle to learn about Newton’s laws.
Materials: 1–2L plastic bottle, water, cork or rubber stopper, bicycle pump with needle adapter, fins made from cardboard/plastic.
Steps: 1) Attach fins to bottle for stability. 2) Fill 1/3 with water. 3) Seal with cork having pump needle and pressurize. 4) Release and observe flight. (Use outdoors and safety gear.)
Expected result: A fast-launching rocket demonstrating action-reaction forces.
Learning outcomes: Newton’s third law, aerodynamics, safe pressurization practices.
Difficulty: Medium. Time: 1–2 hours.
Assessment: Measure height or distance and relate to water volume/pressure.
21. Recycled Plastic Loom Bag
Objective: Make a sturdy woven bag using loops cut from plastic bags and a homemade loom.
Materials: Plastic bag loops (“plarn”), wooden or cardboard loom, crochet hook or needle.
Steps: 1) Create plarn by cutting and tying bags into continuous loops. 2) Weave or crochet on the loom into a bag shape. 3) Finish edges and add handles.
Expected result: A durable, washable bag made entirely from plastic waste.
Learning outcomes: Weaving/crochet skills, textile upcycling, practical design.
Difficulty: Medium. Time: 4–6 hours.
Assessment: Durability test and carrying capacity.
22. Hybrid Recycled Robot Model
Objective: Build a simple moving robot model using motors salvaged from old toys and a body of recycled materials.
Materials: Small DC motor (from toy), battery holder, switches, old gears/wheels, cardboard/plastic parts for body, glue, wires.
Steps: 1) Mount motor to base and attach wheels or a simple cam for movement. 2) Make body and decorative shell from recycled parts. 3) Wire battery and switch, test movement.
Expected result: A basic moving robot demonstrating simple circuits and mechanics.
Learning outcomes: Basic electronics, mechanical motion, reuse of toy components.
Difficulty: Medium. Time: 3–6 hours.
Assessment: Functionality test and explanation of circuit.
23. Reused Denim Pencil Case
Objective: Sew a pencil case using old jeans pockets or legs.
Materials: Old jeans, zipper or button, needle/thread or sewing machine, scissors.
Steps: 1) Cut desired rectangular piece from jeans. 2) Attach zipper or fold and stitch edges. 3) Add lining if desired.
Expected result: Stylish, rugged pencil case from otherwise discarded denim.
Learning outcomes: Sewing practice, textile durability, creative reuse.
Difficulty: Easy–Medium. Time: 1–2 hours.
Assessment: Usability and neatness of stitching.
24. Upcycled Lamp Shade from Canisters
Objective: Make a unique lampshade using metal or large plastic canisters with cutout patterns.
Materials: Metal canister, tin snips or sharp cutter, sandpaper, spray paint (optional), light kit or LED bulb.
Steps: 1) Cut top and bottom as needed. 2) Punch decorative holes or patterns. 3) Smooth edges and attach to lamp base. 4) Test illumination patterns.
Expected result: An artistic lampshade creating interesting light shadows.
Learning outcomes: Metalworking safety, design for light diffusion, repurposing containers.
Difficulty: Medium–Hard. Time: 2–4 hours.
Assessment: Visual effect and safety checks.
25. Recycled Electronics Charging Station
Objective: Build a neat charging station using cardboard, old plastic, and salvaged USB hubs to organize device charging.
Materials: Cardboard/wood base, plastic dividers (from bottles), old USB hub or power strip, glue/fasteners.
Steps: 1) Design slots for phones/tablets. 2) Secure a USB hub inside the base. 3) Create openings for cables and tidy them. 4) Test with multiple devices.
Expected result: Organized, aesthetically pleasing charging hub made from waste material.
Learning outcomes: Cable management, basic electronics safety, product design.
Difficulty: Medium. Time: 2–3 hours.
Assessment: Number of devices charged simultaneously and neatness.
Tips for making any recycle material project successful
- Plan before you start: Sketch your design and list materials.
- Safety first: Wear gloves and goggles when cutting metal/glass and handle adhesives/chemicals carefully.
- Clean and sanitize: Wash bottles, cans, and containers before use.
- Document the process: Take photos at stages — excellent for reports and presentations.
- Test early: Try small prototypes to identify problems quickly.
- Label and present: Prepare a short poster or report explaining materials used, method, environmental impact, and lessons learned.
Evaluation and presentation suggestions (for students)
- Include objective, hypothesis (if scientific), method, results, and conclusion.
- Use before/after photos and short video demonstrations for dynamic exhibits.
- For scientific projects, include data tables, graphs, and controlled comparisons.
- Discuss the environmental impact: estimate how much waste is diverted and the benefits of reuse.
Must Read: Top 149 Agriscience Fair Project Ideas for Students
Conclusion
Recycle material project ideas are a fantastic way to learn while helping the planet. The 25 projects above range from very easy crafts to moderately challenging engineering projects — all emphasize creativity, sustainability, and hands-on learning.
Pick a project that fits your interest and time, gather your recycled materials, follow the steps, and document everything.
You’ll not only finish with a great display for a fair or school assignment, but you’ll also develop skills in design, science, and environmental stewardship.
Remember, small actions add up: one recycled bottle, one crafted notebook, or one planted herb can inspire bigger changes in your community.
Happy building — and enjoy turning waste into wonder!

